
Table of contents
The moment the scent of cheese bread starts drifting through the kitchen, I’m instantly transported to my grandmother’s cozy home. She had a way of turning the simplest moments—like a surprise visit from a neighbor—into something memorable, and this no-knead bread was always her go-to. Crisp on the outside, gooey and cheesy on the inside, it was more than just a snack—it was comfort, tradition, and a little bit of magic.
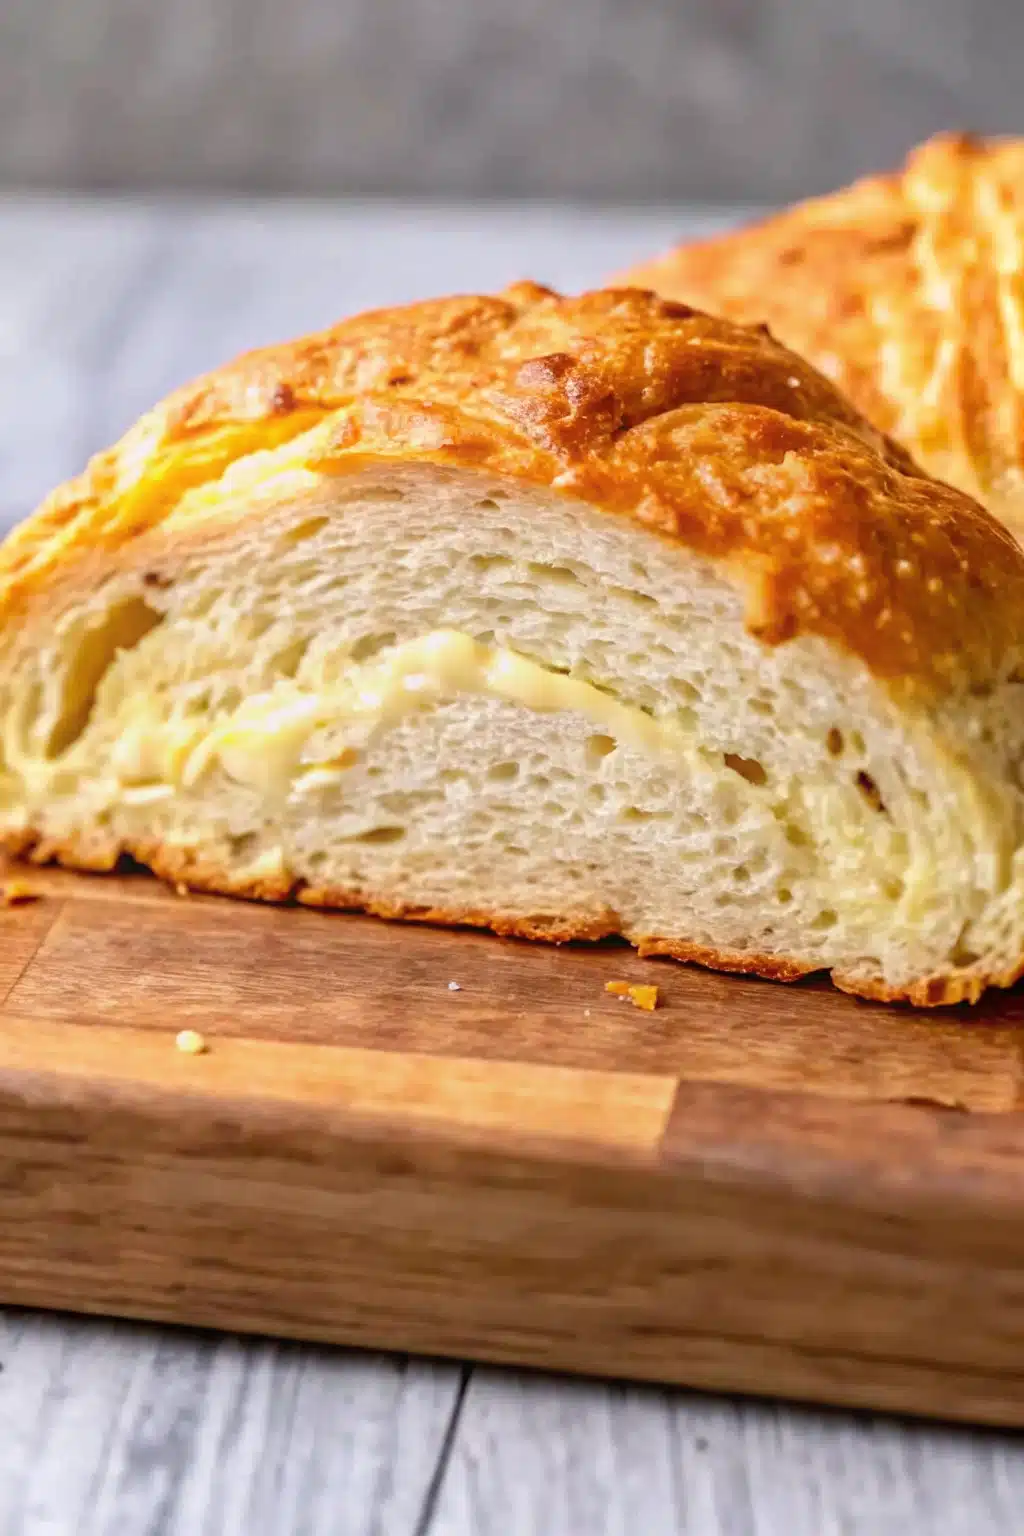
What makes this recipe so special is its simplicity. No need for fancy tools or expert skills—just five everyday ingredients and less than an hour of your time. The result? A beautifully golden loaf with a soft, cheesy center and a crackling crust that makes your kitchen smell like home. It’s humble, hearty, and made to be shared—exactly the kind of baking that feeds more than just your stomach.
Table talk
with Michelle!

Whether it’s paired with a warm bowl of soup or devoured straight from the oven, Easy Homemade Cheese Bread Recipe always steals the show. I’ve baked this more times than I can count—and every time, it disappears in minutes. Gooey, golden, and ridiculously simple, it’s the kind of comfort food that never lets you down.
Michelle
Why You’ll Love This Cheese Bread
This homemade cheese bread has become my go-to recipe for so many reasons. First, it’s incredibly forgiving – even if you’re new to bread making, this recipe practically guarantees success. The no-knead method means you literally just stir everything together and let time do the work for you.
Second, it’s ridiculously versatile. Serve it warm alongside a steaming bowl of soup, slice it thick for the most amazing grilled cheese sandwiches, or just tear off chunks while it’s still warm from the oven (my personal favorite). The Colby cheese creates these beautiful pockets of melted goodness throughout every bite.
Third, it uses ingredients you probably already have in your pantry. No special flours or hard-to-find cheeses required – this is real, everyday cooking that fits into real, everyday life. And finally, it makes your whole house smell absolutely incredible. Cook with feeling, not just timing, and you’ll understand what I mean.
What You’ll Need
Let me walk you through each ingredient because understanding the “why” behind what we’re using makes all the difference in your easy cheese bread.
- Bread flour is my first choice here because it has more protein than all-purpose flour, which gives our bread that perfect chewy texture. But don’t worry if you only have all-purpose flour on hand – it’ll still work beautifully, just with a slightly more tender crumb.
- Instant yeast (sometimes called rapid-rise yeast) is what makes this recipe so wonderfully simple. Unlike active dry yeast, you don’t need to proof it first – just mix it right in with the flour. I always keep a jar in my fridge because it stays fresh for months.
- Kosher salt does more than just season our bread. It strengthens the gluten structure and enhances all the other flavors. I prefer kosher salt because it dissolves evenly and has a clean taste that doesn’t overpower the cheese.
- Very warm tap water activates our yeast and brings everything together. It should feel comfortably warm on your wrist – not hot enough to kill the yeast, but warm enough to get it working. Think baby bath water temperature.
- Freshly shredded Colby cheese is the star of our show. I always shred my own because pre-shredded cheese has anti-caking agents that can affect how well it melts. Colby is mild and melts beautifully, but feel free to experiment with sharp cheddar, Swiss, or even a blend of your favorites.
Let’s Make It Together
- Mix your dry ingredients by whisking together the bread flour, instant yeast, and salt in a large bowl. This ensures everything is evenly distributed before we add the wet ingredients.
- Add the warm water and stir with a wooden spoon until you have a shaggy, sticky dough. Don’t worry if it looks rough – that’s exactly what we want. The dough will be much stickier than traditional bread dough, and that’s perfectly normal.
- Fold in the cheese gently but thoroughly, making sure it’s distributed throughout the dough. Cover the bowl with plastic wrap or a damp kitchen towel and let it rise at room temperature for about 2 hours, until doubled in size.
- Shape and bake by preheating your oven to 450°F and placing a Dutch oven with its lid inside to heat up. Carefully transfer your dough to the hot pot, cover, and bake for 30 minutes. Remove the lid and bake another 15 minutes until golden brown and hollow-sounding when tapped.
Serving Suggestions
This cheese bread shines in so many different ways. Slice it thick and serve alongside a hearty tomato soup or creamy potato chowder – the cheese echoes beautifully with rich, comforting soups. For breakfast, toast slices and top with a fried egg and fresh herbs for something truly special.
I love serving this bread at dinner parties because it’s impressive enough to wow guests but simple enough that I’m not stressed in the kitchen. Cut it into wedges and arrange on a wooden board with some good butter and maybe a drizzle of honey. During the holidays, it makes an excellent addition to any bread basket alongside dinner rolls.
For casual family meals, this bread transforms simple weeknight dinners into something memorable. It’s perfect for mopping up pasta sauce, making incredible garlic bread (just brush with herb butter and broil), or creating the ultimate grilled cheese sandwich that’ll have everyone asking for seconds.
Make It Your Own
The beauty of this cheese bread recipe is how easily it adapts to your taste preferences and what you have on hand. Try mixing different cheeses – a combination of sharp cheddar and Gruyère creates an incredibly rich, complex flavor that’s absolutely divine.
- For a spicy cheese bread, add a pinch of cayenne pepper or some finely diced jalapeños along with the cheese. The heat plays beautifully against the mild bread.
- Create an herb cheese bread by mixing in dried rosemary, thyme, or oregano with the dry ingredients. Fresh herbs work too, but use them sparingly as they can add extra moisture.
- Make it whole grain by substituting up to half the bread flour with whole wheat flour. You might need to add a tablespoon or two more water to compensate for the extra absorption.
- For a garlic cheese bread, mix minced fresh garlic or garlic powder into the dough. Start with just a teaspoon – you can always add more next time.
Kitchen Tips & Tricks
Over the years, I’ve learned a few things about making perfect cheese bread that I wish someone had told me when I was starting out. First, resist the urge to add more flour if the dough seems too sticky. This wet dough is what creates those beautiful, irregular holes throughout the bread.
The water temperature is crucial – too hot and you’ll kill the yeast, too cool and it won’t activate properly. I test mine on my wrist just like you would baby formula. If you’re unsure, err on the side of slightly cooler rather than too hot.
When it comes to the Dutch oven method, make sure both the pot and lid are preheated. This creates an instant steam environment that gives you that gorgeous, crispy crust. Don’t have a Dutch oven? You can use any heavy, oven-safe pot with a tight-fitting lid.
One mistake I made early on was not letting the bread cool enough before slicing. I know it’s tempting when it smells so incredible, but give it at least 30 minutes to set up properly. The cheese needs time to firm up slightly, or you’ll end up with a gooey (though delicious) mess.
Storage & Make-Ahead Tips
Fresh cheese bread keeps beautifully for several days when stored properly. Once completely cooled, wrap it in a clean kitchen towel and store at room temperature for up to three days. The towel helps maintain the crust’s texture better than plastic wrap, which can make it soggy.
For longer storage, slice the bread and freeze individual pieces in freezer bags. They’ll keep for up to three months and can be toasted directly from frozen – perfect for quick breakfasts or last-minute garlic bread. You can also freeze the whole loaf wrapped tightly in plastic wrap and aluminum foil.
The dough itself is wonderfully make-ahead friendly. After the first rise, you can refrigerate it for up to three days. The slow fermentation actually develops more complex flavors. Just bring it back to room temperature before shaping and baking.
To reheat day-old bread, wrap it in foil and warm in a 350°F oven for about 10 minutes. For individual slices, the toaster works perfectly and brings back that crispy exterior we all love.
More Recipes from My Kitchen
If you’re loving this simple approach to homemade bread, you’ll want to try :
Frequently Asked Questions
Absolutely! Your cheese bread will still be delicious, just with a slightly more tender texture. You might need to add a tablespoon or two less water since all-purpose flour doesn’t absorb quite as much liquid.
You can substitute active dry yeast, but you’ll need to proof it first. Dissolve it in the warm water with a pinch of sugar and let it foam for about 5 minutes before adding to the flour mixture.
Yes! You can bake it on a regular baking sheet, but place a pan of hot water on the bottom rack to create steam. The crust won’t be quite as crispy, but it’ll still be delicious.
The bread should be golden brown and sound hollow when you tap the bottom. An instant-read thermometer should register about 200°F in the center.
Definitely! Just be mindful not to add too much moisture. Dried herbs work best, or if using fresh, pat them dry first. Start with small amounts and adjust to taste in future batches.
Final Thoughts
This cheese bread represents everything I love about home cooking – it’s simple, satisfying, and brings people together around the table. You don’t need to be a professional baker to create something that makes your family pause and ask, “What smells so amazing?”
The beauty of this recipe lies in its simplicity and forgiveness. Whether you’re a complete beginner or someone who’s been baking for years, this bread will reward you with consistent, delicious results every single time. Most importantly, it proves that the best recipes aren’t always the most complicated ones – sometimes they’re the ones that fill your kitchen with warmth and your heart with joy.
So go ahead, give it a try. Trust the process, embrace the sticky dough, and let your house fill with that incredible aroma. You can make this – I promise. Thanks for being in my kitchen today.Tools
If you give Easy Homemade Cheese Bread Recipe a try, I’d love to hear how it turned out!
Please take a moment to leave a rating and a quick review—it really helps us keep sharing free, delicious recipes you can trust.

Easy Homemade Cheese Bread Recipe
- Prep Time: 5m
- Cook Time: 45m
- Total Time: 50m
- Yield: 10
- Category: Bread
- Method: Baking
- Cuisine: American
- Diet: Vegetarian
Description
A super easy, no-knead cheese bread with a golden crust and gooey cheesy center—perfect as a side or snack!
Ingredients
- 3 cups bread flour ((Note 1 re: plain/all-purpose flour))
- 2 tsp instant yeast (aka rapid rise (Note 2))
- 1 1/2 tsp cooking/kosher salt
- 1 1/2 cups very warm tap water ((Note 3))
- 2 1/2 cups (tightly packed) Colby cheese, freshly shredded (or other cheese of choice – Note 4)
Instructions
- Mix together flour, yeast, and salt in a large bowl.
- Pour in warm water and stir until a shaggy dough forms—no kneading required.
- Fold in the shredded cheese until evenly distributed.
- Cover bowl and let it rise in a warm spot for 2–3 hours or until doubled in size, then bake at 220°C/430°F for 40–45 minutes until golden brown.
Notes
Use freshly shredded cheese for best melt and flavor. Dough will be sticky—don’t worry, that’s normal!
Nutrition
- Serving Size: 1 slice
- Calories: 273 kcal
- Sugar: 0.3 g
- Sodium: 552 mg
- Fat: 11 g
- Carbohydrates: 29 g
- Fiber: 2 g
- Protein: 13 g


