Table of contents
There’s a certain joy in a dessert that sparks smiles before anyone even takes a bite. This Oreo dirt cake recipe instantly transports me back to childhood, when my grandmother would surprise us with what looked like a flowerpot filled with “dirt.” Of course, beneath that playful topping was a creamy, chocolate-filled treasure we could never resist. It may not be fancy, but it’s packed with love, and believe me, this is one of those treats your family will ask for seconds before finishing their first slice.
I came across this gem in my mom’s recipe box, scribbled on a card so faded you could hardly read the notes. That’s the magic of recipes like this—they’re meant to be shared, passed down, and savored across generations.
Table talk
with Michelle!
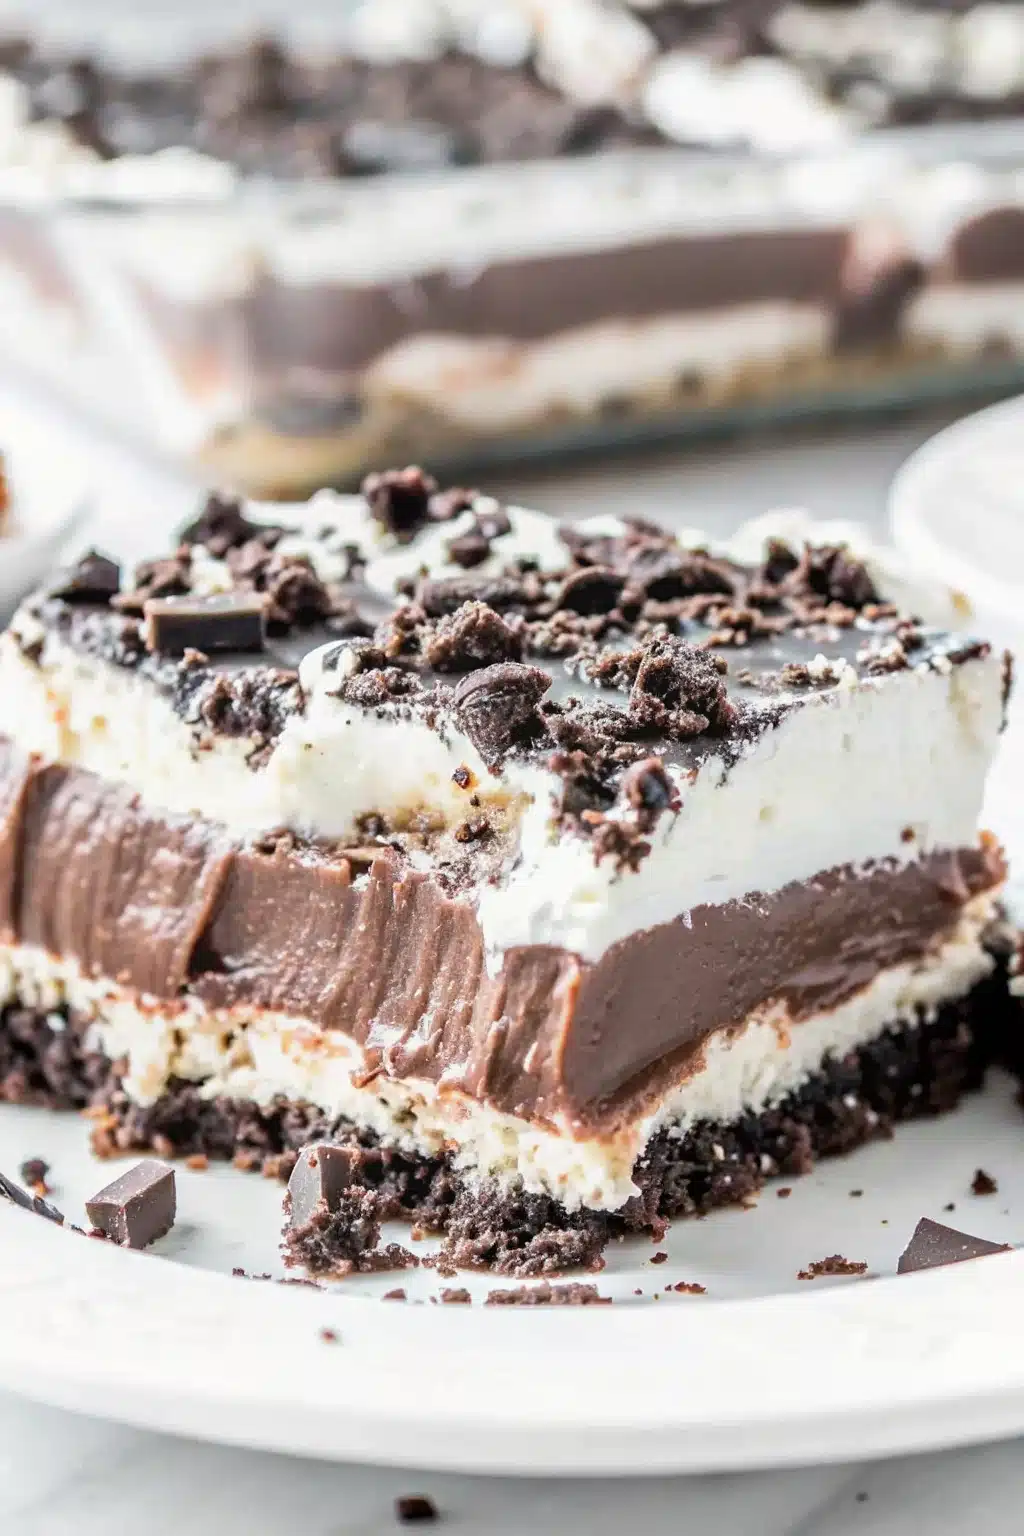
From parties to cookouts, Oreo Dirt Cake Recipe always shines. Kids love the playful “dirt” topping, and adults can’t resist the creamy pudding, fluffy whipped cream, and crunchy Oreo layers. A fun no-bake classic that disappears in no time!
Michelle
Why You’ll Love This Oreo Dirt Cake
Let me tell you why this chocolate dessert has earned a permanent spot in my recipe collection. First, you don’t need to be a chef to make something special here – it’s a no-bake wonder that comes together with simple mixing and layering. The combination of **creamy pudding layers** and that satisfying Oreo crunch creates the perfect texture contrast that’ll have everyone digging in for more.
Most importantly, this is the kind of dessert that brings people together. Kids love the playful “dirt” presentation, while adults appreciate the rich, indulgent flavors. It’s also incredibly forgiving – if your layers aren’t perfect or your Oreos are crushed a bit too much, it still tastes absolutely divine.
What You’ll Need To Make Oreo dirt cake recipe
The beauty of this recipe lies in its simplicity. You’ll find most of these ingredients in your pantry or a quick trip to the grocery store:
- Oreo cookies – The star of our show! I always buy an extra package because, let’s be honest, some might disappear during the crushing process
- Salted butter – This binds our crust together and adds that perfect hint of saltiness
- Hot fudge – Warm it up for easy mixing; it adds extra chocolate richness to our base
- Cream cheese – Make sure it’s softened for smooth, lump-free mixing
- Powdered sugar – Creates that silky sweetness we’re after
- Vanilla extract – Just a touch to enhance all those chocolate flavors
- Heavy cream – This whips up into clouds of deliciousness
- Sweetened condensed milk – The secret to our pudding layer’s incredible richness
- Instant chocolate fudge pudding – Choose your favorite brand; they all work beautifully
- Cold milk – Essential for getting that pudding just right
Let’s Make It Together
Now, let’s get into the kitchen and create some magic. Cook with feeling, not just timing – that’s my motto!
- Crush most of your Oreos in a food processor until they’re fine crumbs. If you don’t have a processor, place them in a zip-top bag and have fun with a rolling pin – it’s great stress relief! Save some whole cookies for later.
- Mix the crumbs with melted butter and warmed hot fudge in a medium bowl. You’ll know it’s ready when everything holds together like wet sand.
- Press this mixture into your 9×13-inch pan using a flat-bottomed glass. Don’t worry about perfection – just make it even and firm. Pop it in the fridge while you work on the filling.
- Beat the cream cheese until it’s smooth and fluffy. Add powdered sugar and vanilla, beating until well combined. This is your flavor foundation.
- Whip the heavy cream in a separate bowl until you get stiff peaks. Gently fold half of this whipped cream into your cream cheese mixture – be gentle to keep it light and airy.
- Spread this creamy layer over your chilled crust, smoothing the top with a spatula.
- Whisk together the cold milk, sweetened condensed milk, and pudding mix until smooth. Pour this chocolate pudding layer over your cream cheese layer.
- Crush the remaining Oreos into chunky pieces – these will be your “dirt” topping.
- Top with remaining whipped cream and sprinkle those crushed Oreos generously over everything. This is where it starts looking like that magical dirt cake!
- Chill for at least 2 hours until set. I know waiting is hard, but trust me – it’s worth it.
- Slice and serve cold. Watch the smiles spread across everyone’s faces!
Serving Suggestions
This layered dessert is perfect for so many occasions. Serve it at birthday parties in individual cups for a fun twist, or keep it classic in the pan for family gatherings. During summer, it’s incredibly refreshing served alongside fresh berries. For special occasions, try serving it in a clear trifle bowl so everyone can see those beautiful chocolate layers.
I love serving this with a dollop of extra whipped cream and maybe a drizzle of chocolate sauce for the true chocolate lovers in your family.
Make It Your Own
The wonderful thing about this Oreo dirt cake recipe is how adaptable it is. Here are some variations I’ve tried and loved:
- Peanut butter twist – Add a few tablespoons of peanut butter to the cream cheese layer
- Mint version – Use mint Oreos and add a drop of mint extract to the cream
- Coffee lovers – Replace some milk with strong cooled coffee for a mocha flavor
- Lighter option – Use sugar-free pudding and light whipped topping
Kitchen Tips & Tricks
Over the years, I’ve learned a few things that make this easy dessert even better. Make sure your cream cheese is truly softened – I often forget and end up with lumps! If this happens, don’t panic; just beat it a bit longer.
When crushing Oreos, don’t make them too fine for the topping layer. You want some texture and visual appeal. Also, chill each layer as you go – it helps everything set properly and makes for cleaner slices.
Storage & Make-Ahead Tips
This Oreo dirt cake recipe actually gets better with time! Store it covered in the refrigerator for up to 3 days. It’s perfect for making ahead – in fact, I often make it the night before serving.
While you can freeze it, I find the texture changes slightly, so I prefer keeping it refrigerated. The chocolate pudding and cream layers maintain their perfect consistency when kept cold.
More Recipes from My Kitchen
If you’re loving this easy approach to impressive desserts, you’ll want to try :
- Chocolate Brownie Protein Balls
- Pistachio Ice Cream
- Homemade Ube Ice Cream
- No Bake Oreo Delight
- Brown Butter Chocolate Chip Cookies
Frequently Asked Questions
Absolutely! Chocolate wafer cookies or even graham crackers work beautifully. The flavor will change, but it’ll still be delicious.
You can make this layered chocolate dessert up to 2 days ahead. It actually improves as the flavors meld together.
Yes! Layer everything in clear cups or mason jars for adorable individual portions.
You can make homemade chocolate pudding, but make sure it’s completely cooled before adding it to your layers.
Final Thoughts
This Oreo dirt cake recipe is more than just a dessert – it’s a memory maker. Every time I serve this, I watch faces light up with that same wonder I felt as a child. It’s proof that the best recipes aren’t always the most complicated ones.
You can make this – I promise. Whether you’re a seasoned baker or just starting your kitchen journey, this recipe will give you confidence and bring joy to your table. Don’t be afraid to make it your own, and most importantly, have fun with it!
Thanks for being in my kitchen today. I hope this recipe brings as much happiness to your family as it has to mine.
If you give Oreo Dirt Cake Recipe a try, I’d love to hear how it turned out!
Please take a moment to leave a rating and a quick review—it really helps us keep sharing free, delicious recipes you can trust.

Oreo Dirt Cake Recipe
- Prep Time: 15 mins
- Cook Time: 2 hrs
- Total Time: 2 hrs 15 mins
- Yield: 12 servings
- Category: Dessert
- Method: No Bake
- Cuisine: American
- Diet: Vegetarian
Description
A creamy, layered Oreo dessert with rich chocolate pudding, smooth cream cheese filling, and fluffy whipped cream, topped with crushed Oreos for the ultimate treat.
Ingredients
- 1 (14.3-ounce) package Oreo cookies
- ¼ cup salted butter (melted)
- ¼ cup hot fudge (warmed)
- 1 (8-ounce) package cream cheese (softened)
- ½ cup powdered sugar
- 1 teaspoon vanilla extract
- 2 cups heavy cream
- 1 (14-ounce) can sweetened condensed milk
- 1 (5.9-ounce) box instant chocolate fudge pudding
- 1½ cups cold milk
Instructions
- Crush ¾ of the Oreo cookies in a food processor or by placing them in a zip-top bag and crushing them with a rolling pin until the cookies are broken down into very small pieces. Set the remaining Oreos aside for later.
- In a medium bowl, mix the large portion of Oreo crumbs with the melted butter and the fudge until well combined.
- Press the Oreo crumb mixture into the bottom of a 9×13-inch pan, using a flat-bottomed glass to press it evenly. Chill in the refrigerator while preparing the filling.
- In a large bowl, beat the cream cheese with an electric mixer until smooth. Add the powdered sugar and vanilla extract, and beat until well combined.
- In a separate bowl, whip the heavy cream until stiff peaks form. Fold ½ of the whipped cream into the cream cheese mixture until well combined.
- Pour the filling into the prepared crust and smooth the top.
- Add milk, sweetened condensed milk, and chocolate pudding mix into a bowl and whisk together until nice and even. Add the pudding mixture on top of the cream cheese layer.
- Put the remaining Oreo cookies into a zip-top bag and crush them into large pieces.
- Top with the remaining whipped cream, and sprinkle the reserved crushed Oreos on top.
- Cover and chill the dessert in the refrigerator for at least 2 hours or until set.
- Once set, slice and serve while cold. Enjoy!
Notes
For best results, chill overnight to let the layers set completely.
Nutrition
- Serving Size: 1 slice
- Calories: 231 kcal
- Sugar: 10 g
- Sodium: 77 mg
- Fat: 20 g
- Carbohydrates: 12 g
- Fiber: 0.2 g
- Protein: 2 g


